Adding New Blog Posts to Your Divi Website If you’re using...

How to Setup A Post With Divi
read more

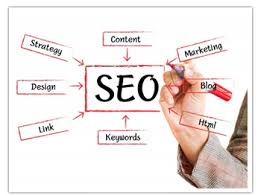
Search engine optimization (SEO) is the process of affecting the online visibility of a website or a web page in a web search engine’s unpaid results—often referred to as “natural”, “organic”, or “earned” results.
Adding New Blog Posts to Your Divi Website If you’re using...

How to Use the Business Model Canvas to Shape Your...

Startup Canada Awards Startup Canada Awards In Miramichi...

Business Model Canvas – Opportunities NB The Business...

Startup Support Plus A Full-Service Web Design Agency....
Our team is committed to delivering reliable, high-quality solutions tailored to meet the unique needs of each client. We take a strategic approach to every project, combining industry knowledge with practical experience to ensure consistent and measurable results. From initial consultation to final delivery, our process is designed to be transparent, efficient, and focused on long-term value.
We understand that every business operates differently, which is why we prioritize clear communication and customized planning. By working closely with our clients, we are able to identify key objectives, streamline workflows, and implement solutions that support growth and performance. Our goal is not only to complete the task at hand but to build lasting partnerships based on trust and results.
Whether you are looking to improve existing systems or develop something new, our team is equipped to guide you through each step. We continuously adapt to industry trends and evolving technologies, ensuring that the solutions we provide remain effective, relevant, and scalable for the future.
We believe that strong results come from strong relationships. That is why we take the time to understand each client’s needs, priorities, and long-term goals before starting any project. Our process is built on collaboration, ensuring that you remain informed and involved at every stage. This approach allows us to deliver solutions that truly reflect your vision while maintaining a high standard of quality and consistency.
Our team is dedicated to providing dependable service you can rely on. We focus on clear timelines, open communication, and attention to detail, so you always know what to expect. By combining experience with a commitment to excellence, we are able to deliver outcomes that meet both immediate needs and future growth.
No matter the size or scope of the project, our goal remains the same: to provide value, build trust, and support your ongoing success. We take pride in creating solutions that not only work today but continue to perform well over time.
Looking to build your online presence? Contact Startup Support Plus today to get expert help with website design, SEO, and business digital tools. We serve clients in Moncton and across Atlantic Canada with responsive support and reliable results.
We specialize in custom WordPress websites using top-tier tools like DIVI, ensuring your site not only looks great but also performs. Whether you’re starting from scratch or upgrading, we’re ready to help. Let’s build something that works. Explore our services or message us directly. We’re ready when you are.